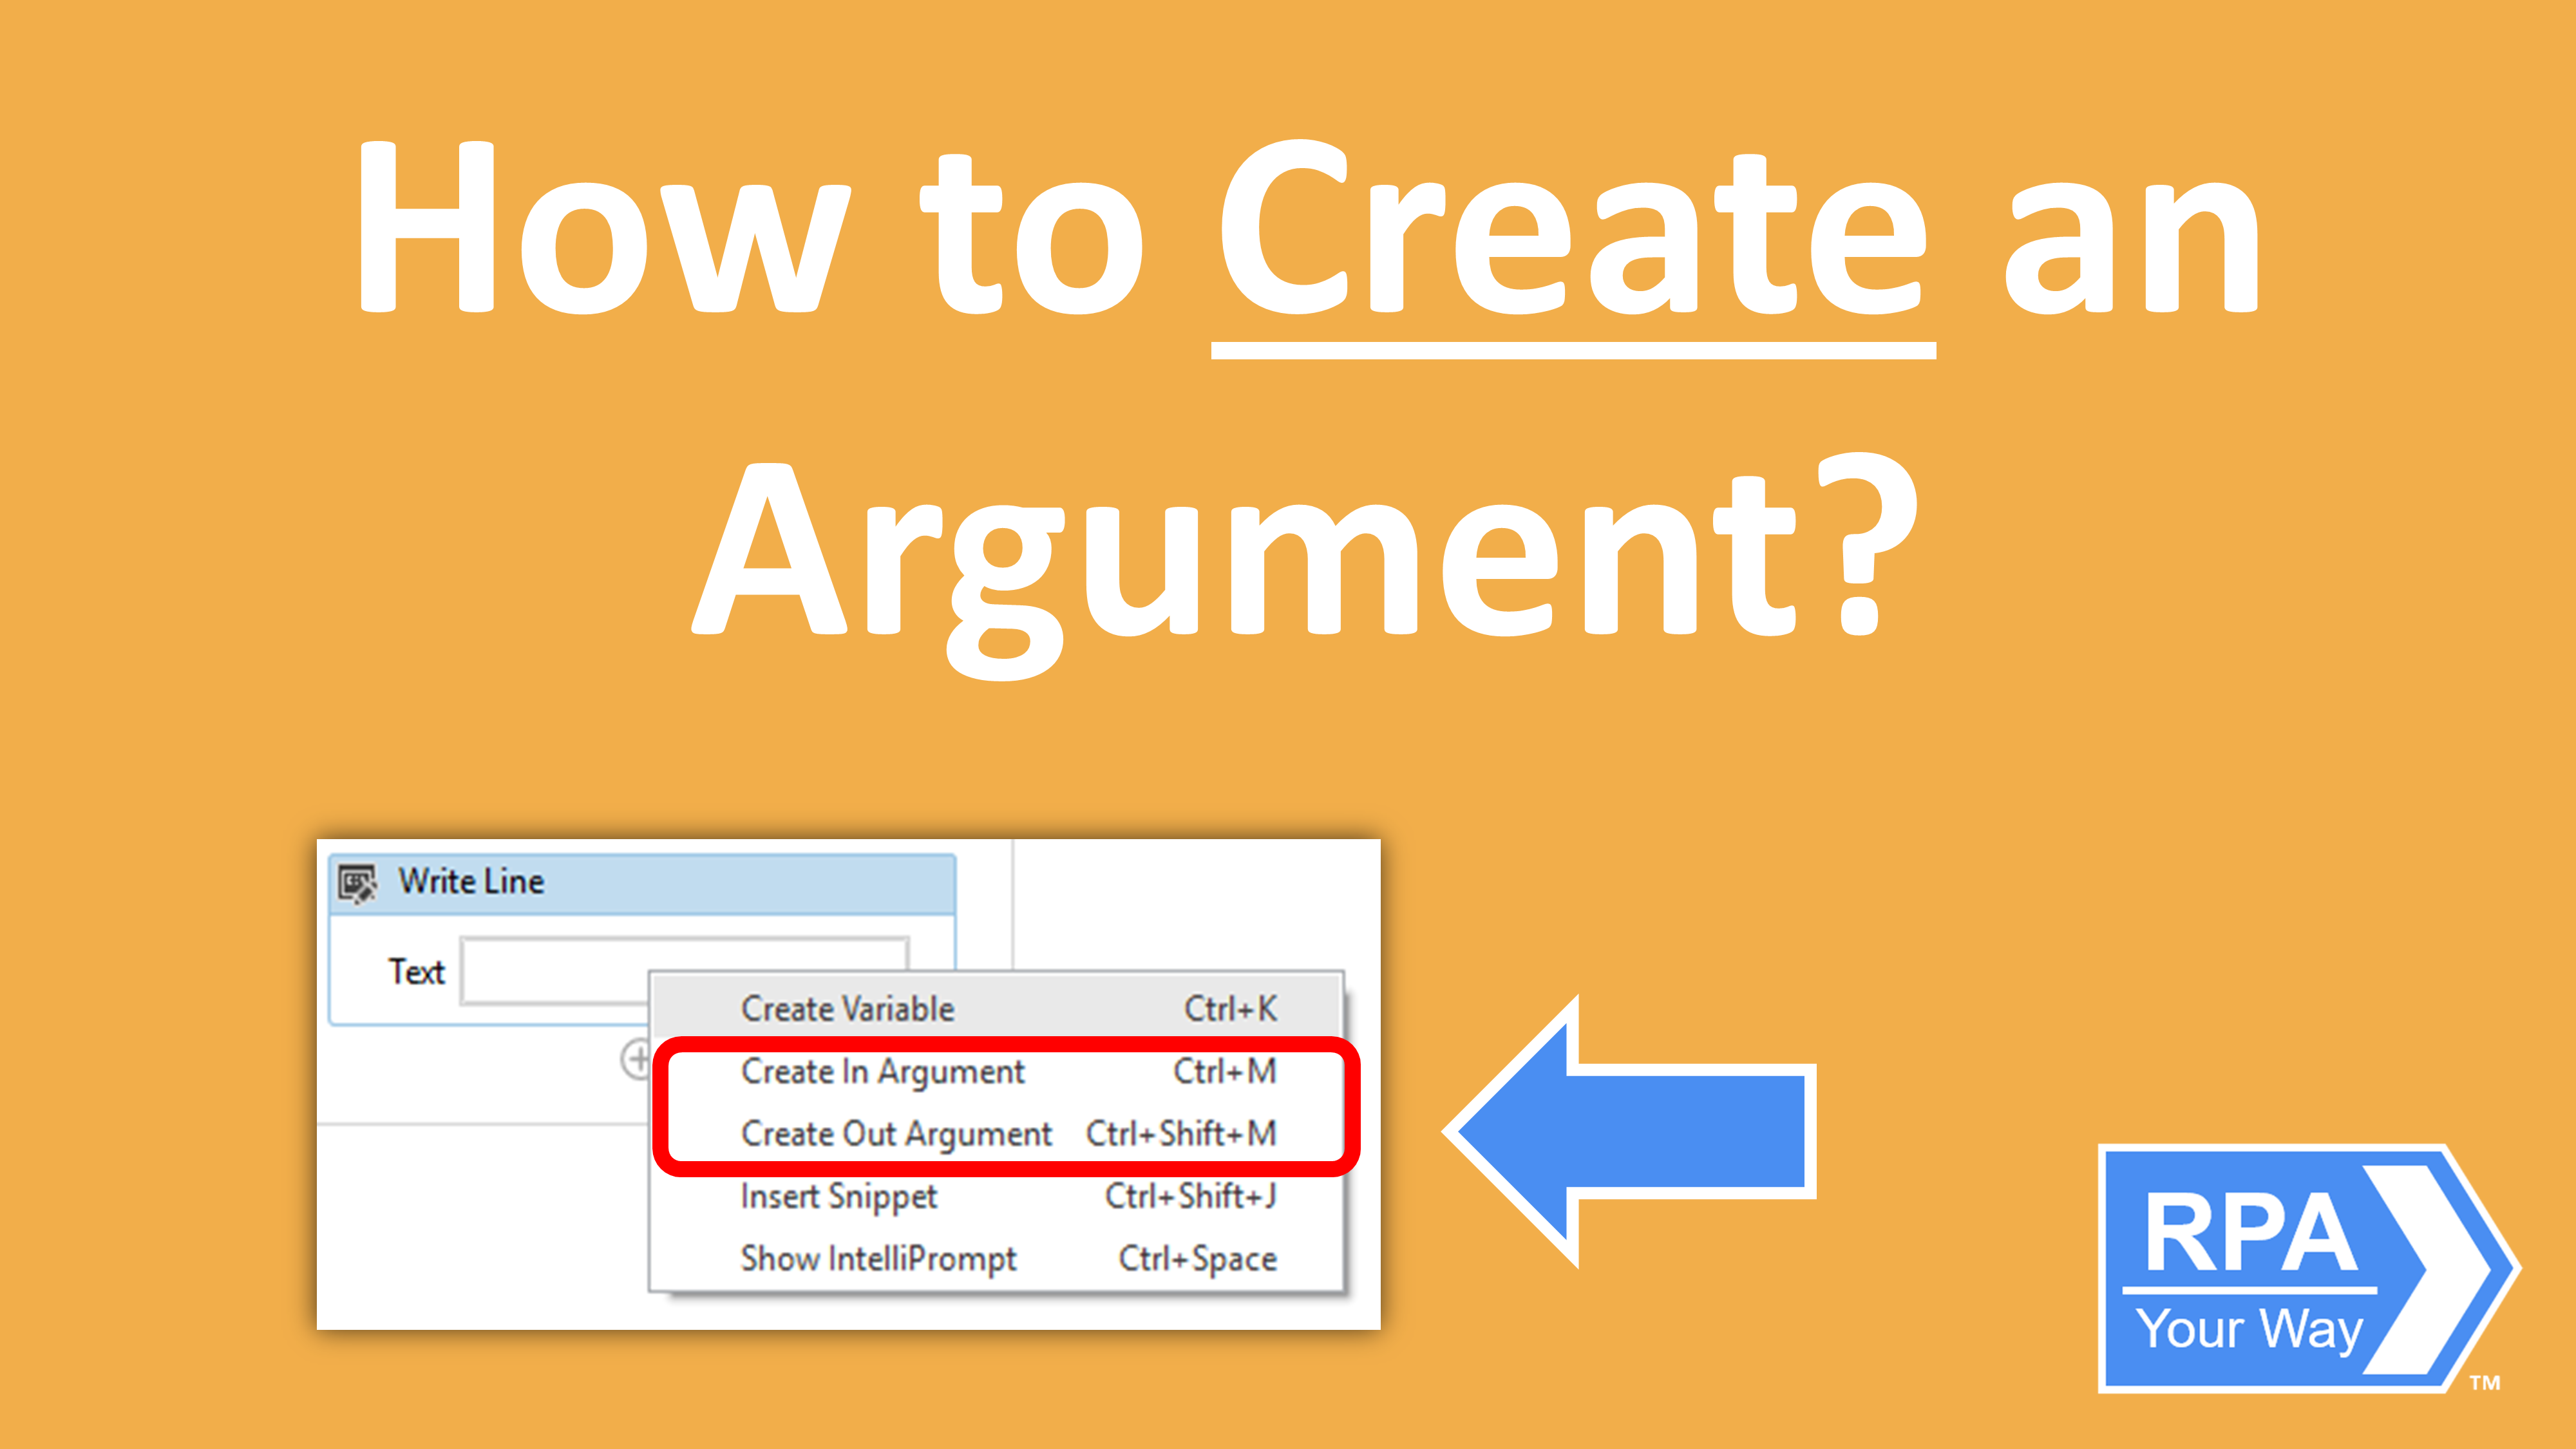
To use an argument in any of your automations, you must first create it. This can be done in multiple ways:
It is important to learn all three methods to figure out which works best for you.
Inside an Activity
- Step 1: Right Mouse Click any area inside an activity that allows for text.
- Step 2: Left Click either Create In Argument or Create Out Argument.
- Step 3: Type in your argument name and hit Enter.
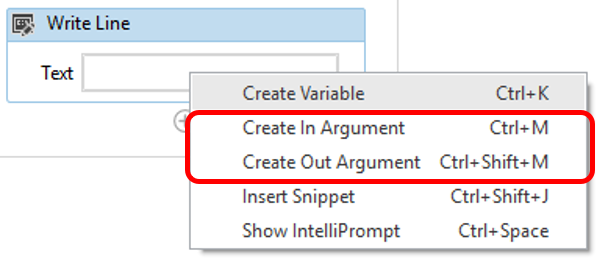
Arguments created this way are automatically converted into the correct data type according to the activity. For example, if you create an argument in the DataTable field in a Write CSV activity, the argument’s type will be automatically set to DataTable.
Note: It is not possible to create an In/Out Argument using this method.
Inside the Properties Panel
- Step 1: Navigate to the Properties panel.
- Step 2: Right Mouse Click any area that allows for text.
- Step 3: Left Click either Create In Argument or Create Out Argument.
- Step 4: Type your argument name and hit Enter.
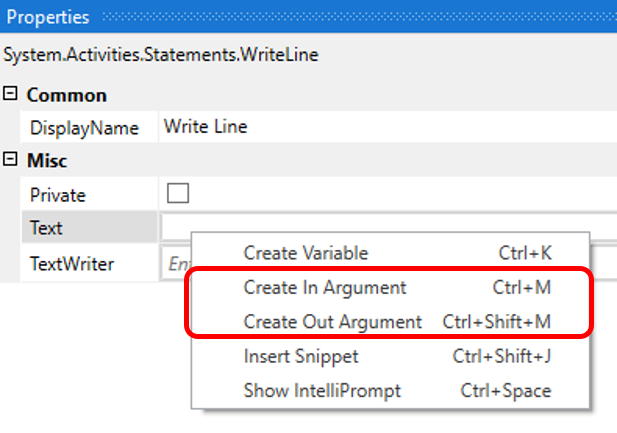
Arguments created this way are automatically converted into the correct data type according to the activity. For example, if you create an argument in the DataTable field in a Write CSV activity, the variable’s type will be automatically set to DataTable.
Note: It is not possible to create an In/Out Argument using this method.
Inside the Variables Panel
- Step 1: Navigate to the Arguments panel.
- Step 2: Left Click Create Argument
- Step 3: Type in the Argument Name
- Step 4: Select the Argument type from the drop-down menu
- Step 5: Select the Direction from the drop-down menu. This can be either In, Out, or In/Out.
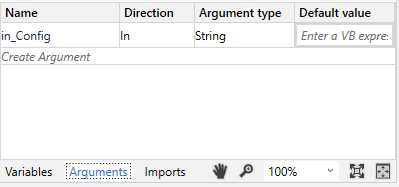
When creating arguments in the Arguments Panel, the default Argument Type is set to String and may need to be changed depending on whether you want to use a different data type.
